

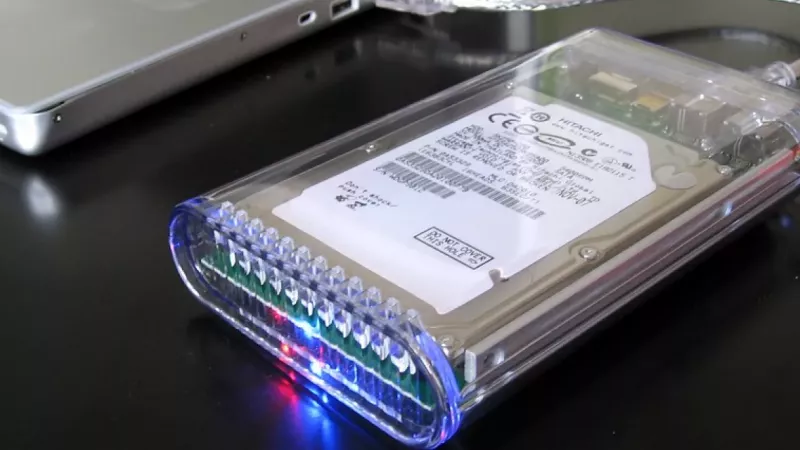
Every hardware refresh leaves the same by-product behind: a stack of drives that still pass diagnostics but no longer have a machine to live in. Sending functional storage to recycling is a measurable loss, both financially and environmentally. An external enclosure converts that idle hardware into a portable backup target, an archive volume or a fast transfer tool for the price of a small aluminium shell and a bridge chip.
This guide walks through the whole process from a professional angle: identifying exactly what kind of drive you are holding, selecting an enclosure that will not throttle it, sanitising the data it carries, and putting the finished unit to work without risking the files you intend to trust it with.
Why a Retired Drive Is Rarely Dead Weight
Mechanical hard drives are typically decommissioned on a schedule, not because they failed. A three-year-old 2 TB HDD pulled from an office desktop usually has tens of thousands of healthy operating hours ahead of it. SATA SSDs displaced by NVMe upgrades are an even clearer case: wear indicators on consumer flash drives frequently show more than 90 percent of rated endurance remaining at the moment of replacement.
The economics are straightforward. A quality enclosure costs a fraction of an equivalent ready-made external drive, and the assembled result is functionally identical. For organisations handling dozens of decommissioned units per year, systematic reuse also tightens asset disposal procedures, because every drive receives a verified wipe as a mandatory step of the workflow instead of leaving the building with data intact.
Matching the Enclosure to the Drive
Before ordering anything, identify the drive precisely. The label states the form factor and the interface, and both must match the housing. Browsing a catalogue of storage drive enclosures becomes far more productive once you know which three or four models are actually compatible with the hardware on your desk.
2.5-inch and 3.5-inch SATA drives
Laptop drives measure 2.5 inches, draw little power and run from the USB port alone, which keeps the enclosure compact and cable-free. Desktop 3.5-inch drives demand a 12 V rail that USB cannot supply, so their enclosures always ship with an external power adapter and are best treated as semi-stationary units. Height matters as well: most 2.5-inch housings accept 7 mm drives, while older 9.5 mm and 15 mm units need a shell that explicitly lists that clearance in its specification.
M.2 SATA versus M.2 NVMe
M.2 is a physical slot, not a protocol, and this is where most compatibility mistakes happen. An M.2 SATA module and an M.2 NVMe module can look nearly identical, yet they require different bridge electronics. Check the drive label or the original specification sheet: the edge-connector keying gives a hint, but the exact model number is definitive. Dual-protocol enclosures that accept both types exist and are the safe default when you manage mixed hardware from several generations.
The Interface Checklist That Prevents Bottlenecks
- USB generation. USB 3.2 Gen 1 at 5 Gbps is sufficient for any mechanical drive and for most SATA SSDs. NVMe modules deserve Gen 2 at 10 Gbps or better, otherwise you are paying for speed the bridge will never deliver.
- UASP support. The USB Attached SCSI Protocol cuts command overhead and noticeably improves small-file performance. Practically all current bridge chips implement it, but bargain-bin legacy stock may not.
- TRIM pass-through. For SSDs, confirm the enclosure forwards TRIM commands to the drive. Without it, sustained write performance slowly degrades over months of normal use.
- Cable and connector. USB-C on the enclosure side is now the norm; verify that the supplied cable actually matches the ports on the machines that will host the drive rather than assuming it will.
- Chipset reputation. The bridge controller determines stability under load. Established controller families handle sleep states and reconnects gracefully; anonymous ones are the usual culprit behind random disconnects.
A Safe Reuse Workflow in Five Steps
Treat every retired drive as if it contained confidential material, because it often does. The following sequence takes well under an hour of hands-on time per unit and produces a device you can genuinely rely on.
- Step 1 — read the health data. Connect the drive and inspect its SMART attributes. Reallocated sectors, pending sectors or uncorrectable error counts above zero on a mechanical drive are grounds for recycling instead of reuse. No enclosure fixes failing media.
- Step 2 — rescue anything needed. Copy remaining useful data to another location before any destructive step. This sounds obvious and is skipped surprisingly often, usually five minutes before it stops being possible.
- Step 3 — sanitise. For HDDs, a single full overwrite pass is adequate for ordinary business data. For SSDs, issue a secure erase through the manufacturer utility, which resets all cells and restores factory write performance at the same time.
- Step 4 — build a fresh partition table and file system. exFAT offers the widest compatibility across Windows and macOS; NTFS suits Windows-only backup duty; ext4 fits Linux servers and NAS side-loading.
- Step 5 — verify under load. Run one full-surface write-and-read pass. It exercises the drive, bridge, cable and port together and exposes weak links before real data depends on them.
A drive that has never been verified is a drive you have not finished building. Ten minutes of surface testing prevents the classic failure mode of discovering a flaky cable during your first restore attempt.
Thermal and Power Realities
Enclosures concentrate heat in a small, often unventilated volume. A SATA SSD rarely cares, but an NVMe module under sustained transfer can reach throttling temperatures inside a plastic shell within minutes. Prefer aluminium housings with proper thermal pads for NVMe builds, and give 3.5-inch mechanical drives some airflow if they will run for hours at a stretch.
Power is the second silent reliability killer. Bus-powered 2.5-inch hard drives can brown out on weak front-panel ports or long passive cables, producing random disconnects that masquerade as drive failure. If you see unexplained dropouts, move the unit to a rear motherboard port or a powered hub before blaming the disk.
Deployment Ideas for Reclaimed Storage
Once verified, a reclaimed drive slots into several productive roles. Rotating offline backups are the most valuable: a drive that spends most of its life disconnected is immune to ransomware that encrypts everything currently mounted. Large-capacity HDDs suit media archives, surveillance footage overflow and cold project storage. Smaller SSDs in compact housings make excellent scratch disks for photo and video editing on laptops with soldered internal storage.
It is also worth running the numbers honestly. If an inventory review shows you need more capacity or speed than the retired stock can offer, comparing current portable HDDs and SSDs against an enclosure build gives you a clean cost baseline — and at distribution scale, partners working with DistriNode often standardise on one enclosure model per form factor to simplify support.
Frequently Asked Questions
Can I reuse the drive from a laptop that no longer boots?
Usually yes. A dead motherboard, screen or power circuit says nothing about drive health. Mount the disk in an enclosure, check the SMART report, and if the indicators are clean it is a perfectly normal candidate for a second life. This is also the standard method for recovering files from a machine that will never start again.
Does a 3.5-inch enclosure need a cooling fan?
For intermittent backup sessions, passive metal housings are entirely adequate. For continuous duty such as media serving or long archival copies, a ventilated or fan-equipped model keeps the mechanism in a comfortable temperature band, which pays off in longevity.
Will an encrypted system drive still open inside an enclosure?
The volume itself stays intact, but a system disk protected by a key bound to the original machine will request its recovery key when unlocked elsewhere. Locate and store that key before migrating the drive, not after.
Why does my NVMe enclosure crawl at 40 MB/s on an older computer?
The port is the limit, not the enclosure. A USB 2.0 socket caps real throughput at roughly that figure regardless of what is inside the housing. Plug the same unit into a USB 3.x port and full speed returns immediately.
Is frequent plugging and unplugging harmful?
Connector cycles are rated in the thousands, so mechanical wear is not a concern. What does matter is using the safe-removal function: operating systems cache writes, and yanking the cable mid-flush is the fastest way to corrupt a file system on an otherwise healthy disk.
Leave a comment