

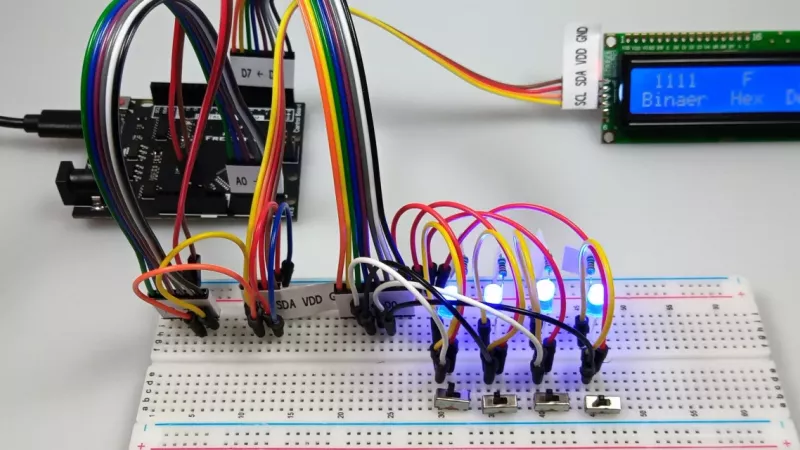
Arduino, ESP32 or Raspberry Pi? It is the first question almost every maker, student and engineer asks, and the honest answer is that these boards are not really competitors. An Arduino and an ESP32 are microcontroller boards that run a single program the moment power is applied. A Raspberry Pi 5 is a small Linux computer. Pick the wrong type and a weekend project turns into a month of workarounds; pick the right one and the hardware simply disappears into the background while you build.
This guide explains the difference in plain language, compares the boards South African buyers actually find on the shelf, and matches them to real projects: learning electronics at school, Wi-Fi sensors for the home, battery-powered loggers, robots, cameras and small servers. We also cover power supplies, 3.3 V versus 5 V logic, the accessories you will genuinely need, and the handful of mistakes that most often kill a first board.
Microcontroller or single-board computer: the difference that decides everything
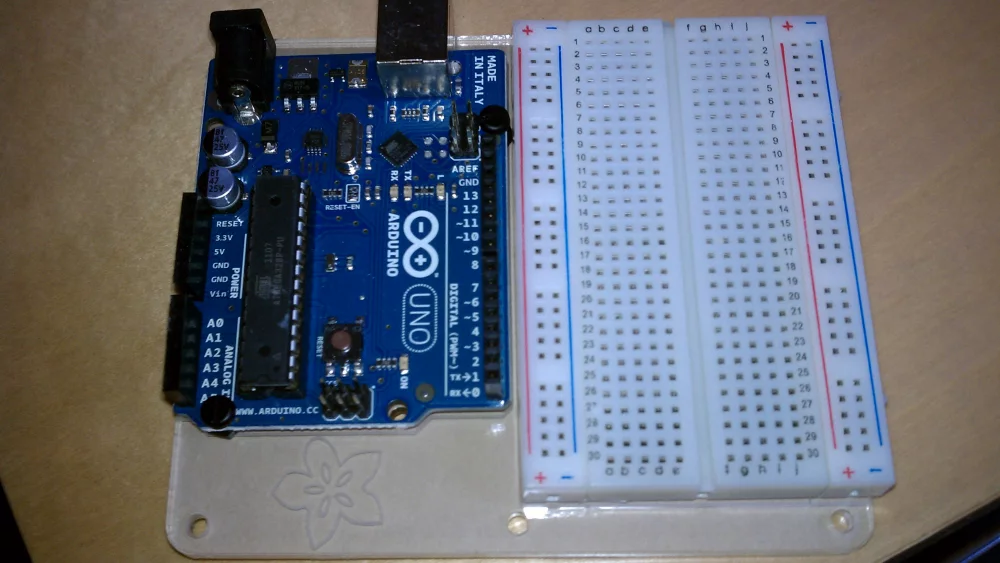
Every board in this guide falls into one of two families. Understanding which family your project needs is more important than any benchmark, clock speed or price comparison.
What a microcontroller does well
A microcontroller (MCU) is a complete tiny computer on one chip: processor, a little memory, flash storage and dozens of input and output pins. There is no operating system. You write a program, upload it over USB, and the board runs that one program in a loop for as long as it has power. It starts in a fraction of a second, reacts to a button or sensor within microseconds, and usually draws only a few milliamps. Arduino boards, ESP32 boards and the Raspberry Pi Pico are all microcontrollers.
That simplicity is the point. A microcontroller that reads a soil-moisture sensor and switches a pump will do exactly that, every time, for years. It does not install updates, it does not fill up a memory card, and it does not mind if the power is cut halfway through a loop.
What a single-board computer does well
A single-board computer (SBC) such as the Raspberry Pi 5 runs a full operating system, usually a Debian-based Linux. That gives you a desktop, Python, web servers, databases, camera software, network storage and thousands of ready-made packages. If your project needs to record video, run a dashboard, host Home Assistant, process images or talk to several online services at once, you want a computer, not a microcontroller.
The price of that flexibility is complexity. An SBC takes tens of seconds to boot, needs a proper power supply and storage, and should be shut down cleanly. It also uses far more energy: a Raspberry Pi 5 draws several watts, while an idle ESP32 can sleep on microamps.
Why power interruptions matter
Anyone who has lived through load-shedding knows that power in South Africa is not always a given. A microcontroller simply restarts its program when power returns. A Raspberry Pi that loses power while writing to its microSD card can corrupt the file system and refuse to boot. If an SBC project must survive outages, plan for it from day one: a small UPS board or battery pack, an SSD instead of a memory card, or a read-only file system for appliances that rarely change.
| Criterion | Microcontroller (Arduino, ESP32, Pico) | Single-board computer (Raspberry Pi 5) |
|---|---|---|
| Start-up | Under a second | Roughly 15 to 40 seconds |
| Operating system | None, one program runs directly | Linux with a full software stack |
| Power use | Milliamps, microamps in deep sleep | Several watts, more under load |
| Timing | Precise and predictable | Good, but shared with the operating system |
| Sudden power loss | Harmless in most projects | Risk of storage corruption |
| Typical projects | Sensors, motors, lights, controllers | Cameras, servers, dashboards, AI, media |
A useful rule of thumb: if the project could run on batteries for months, it wants a microcontroller. If it needs a screen, a camera or a web browser, it wants a computer.
Arduino: the classroom standard
Arduino made microcontrollers approachable for people who had never touched a soldering iron. Its real strength is not the hardware itself but the ecosystem around it: the free Arduino IDE, tens of thousands of tutorials, libraries for almost every sensor, and add-on boards called shields that plug straight on top. You will find the full range in our development boards category.
Arduino Uno R3: simple and forgiving
The Uno R3 is built around the ATmega328P, an 8-bit chip running at 16 MHz with 32 KB of flash and just 2 KB of working memory. Those numbers sound tiny, and they are, yet they are enough for blinking lights, reading sensors, driving small motors and learning how electronics really work. Its 5 V logic matches many older hobby modules, which makes wiring forgiving for beginners.
Arduino Uno R4: same shape, far more headroom
The Uno R4 keeps the familiar board shape and 5 V operation but moves to a 32-bit Arm Cortex-M4 processor at 48 MHz with 256 KB of flash and 32 KB of memory. The Uno R4 WiFi adds an ESP32-S3 module for Wi-Fi and Bluetooth plus a small LED matrix that is perfect for classroom demonstrations. For anyone starting today, an R4 is the more future-proof choice.
The Nano family for small builds
Nano boards pack the same ideas into a stick that fits straight into a breadboard. The Nano Every is a low-cost classic, while the Nano ESP32 combines the Arduino form factor with an ESP32-S3 chip and wireless connectivity. They are ideal for wearables, compact sensors and projects that end up inside a small enclosure.
Pro boards and the Arduino UNO Q
Arduino also makes industrial and vision-oriented boards under the Portenta and Nicla names, aimed at engineers who need certified components and long-term availability. The newest twist is the Arduino UNO Q, which puts a quad-core Qualcomm processor running Debian Linux and an STM32 microcontroller on one Uno-sized board. In practice it bridges the gap between the two families: the Linux side handles cameras and networking, while the microcontroller side keeps precise control of pins and motors.
Original or compatible board?
Arduino hardware is open source, so compatible boards are everywhere and often cost a fraction of the original. For learning they work well, but quality varies. Many use a different USB chip that needs an extra driver, some ship with poorly soldered headers, and documentation is usually thin. Originals cost more but come with proper documentation and support the development of the platform. A sensible compromise is an original board for the classroom or your first kit and compatible boards for projects you plan to leave permanently installed.
ESP32: Wi-Fi and Bluetooth built in
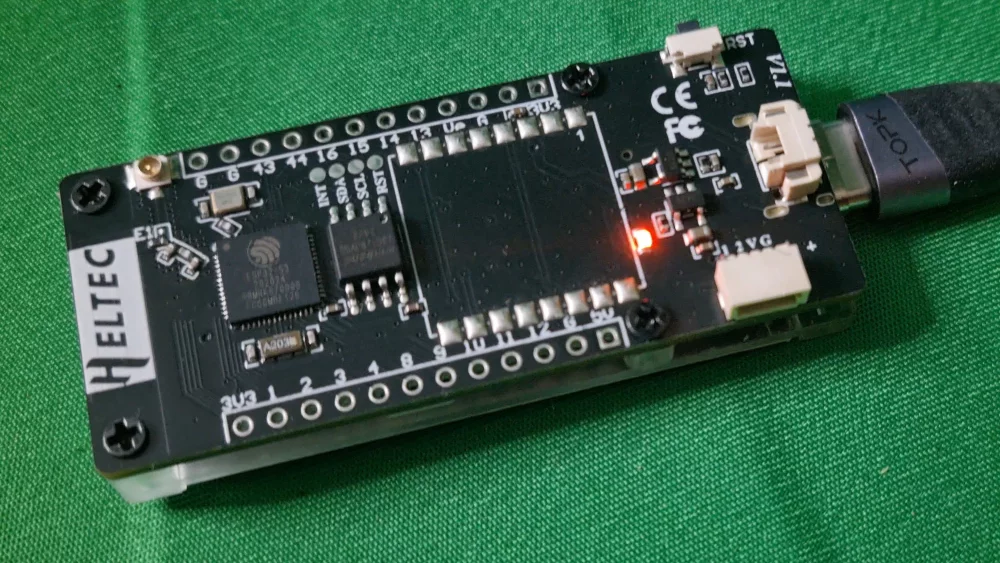
The ESP32 family from Espressif turned wireless projects from expensive to trivial. A single chip includes Wi-Fi, Bluetooth, a fast processor and plenty of memory, and development boards based on it cost less than many Arduino originals. Most of our Wi-Fi-capable boards, including Joy-IT NodeMCU-style modules, belong to this family.
Which ESP32 should you buy?
ESP32 (original): dual-core processor up to 240 MHz, 520 KB of memory, 2.4 GHz Wi-Fi and both classic Bluetooth and Bluetooth Low Energy. Still the best-documented choice, see the Espressif ESP32 overview.
ESP32-S3: faster dual-core design with native USB and extra instructions for signal processing and small machine-learning models. A strong pick for displays, cameras and voice projects.
ESP32-C3: a single-core RISC-V chip with Wi-Fi and Bluetooth LE. Cheaper and simpler, ideal for straightforward sensors.
ESP32-C6: adds Wi-Fi 6 and an 802.15.4 radio for Thread and Zigbee, which makes it the natural choice for Matter smart-home devices. Details are on the ESP32-C6 page.
How you program an ESP32
You can program an ESP32 in the Arduino IDE, which makes the jump from an Uno almost painless. Professionals often use Espressif’s own ESP-IDF framework or PlatformIO for larger projects. If you prefer Python, MicroPython runs well on most ESP32 boards. For home automation, ESPHome lets you describe a sensor in a short configuration file and have it appear in Home Assistant without writing C++ at all.
Battery life: the chip versus the board
Datasheets quote impressive deep-sleep figures, but those numbers refer to the bare chip. A typical development board also carries a USB-to-serial converter, a voltage regulator and a power LED, all of which keep drawing current while the chip sleeps. The result can be the difference between a sensor that lasts a year and one that lasts two weeks. For battery projects, choose boards designed for low power, remove or avoid power LEDs, and measure the real current with a multimeter before you commit.
Remember: 3.3 V logic
ESP32 pins work at 3.3 V and are not designed for 5 V signals. Connecting a 5 V sensor output directly to an ESP32 input can damage it over time or instantly. Use modules rated for 3.3 V, or a simple level shifter between the two worlds.
The most common ESP32 failure we hear about is not a faulty chip. It is a 5 V signal wired straight into a 3.3 V pin because an old tutorial was written for an Arduino Uno.
Raspberry Pi: a real computer for projects that need one
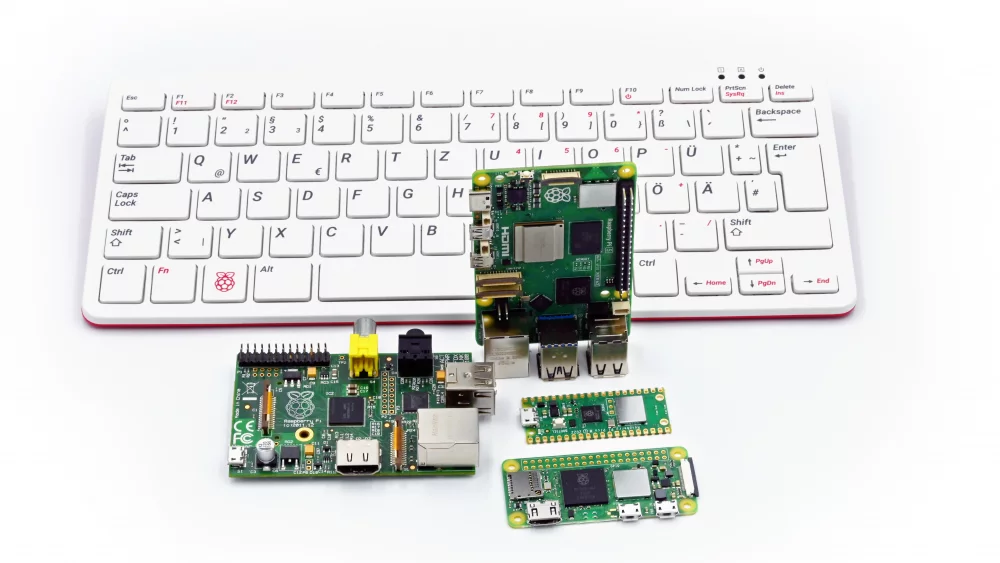
Raspberry Pi boards are the best-known single-board computers in the world, and the huge user base is their biggest advantage: almost every problem you will meet has been solved and documented by someone else. Browse our single-board computers for Raspberry Pi and alternative boards.
Raspberry Pi 5
The Raspberry Pi 5 uses a quad-core Arm Cortex-A76 processor at 2.4 GHz with 2 GB to 16 GB of memory, two micro-HDMI outputs for 4K screens, Gigabit Ethernet, Wi-Fi, Bluetooth, USB 3.0 and a PCIe connector for fast NVMe storage. For everyday computing it feels like a modest desktop PC, and for projects it is dramatically faster than earlier models.
Two practical points matter more than the specification sheet. First, the Pi 5 wants a 5 V, 5 A USB-C power supply (the official unit is rated at 27 W) to deliver full power to USB devices; a weaker phone charger leads to warnings and unstable peripherals. Second, it runs warm under load, so an active cooler or a case with a fan is a sensible part of every build.
Raspberry Pi Pico 2: same name, different family
The Raspberry Pi Pico 2 is not a computer at all but a microcontroller board, much closer to an Arduino. According to the Pico 2 product brief, its RP2350 chip has two cores that can run as Arm Cortex-M33 or RISC-V at 150 MHz, 520 KB of memory and 4 MB of flash. Its programmable I/O blocks can generate unusual signal timings in hardware, which makes it popular for LED strips, retro video and custom interfaces. The Pico 2 W version adds Wi-Fi and Bluetooth.
Storage: microSD card or SSD?
Most Raspberry Pi projects start on a microSD card, and for experiments that is fine. For anything that runs around the clock, such as a home server, camera recorder or Home Assistant host, an NVMe SSD on a PCIe adapter is faster and far more resistant to wear and power cuts. If you stay with a card, choose a reputable A2-rated model and keep a backup image.
Alternative boards
Banana Pi, Orange Pi and industrial boards from other manufacturers can offer more ports, eMMC storage or better value on paper. Before choosing one, check which operating systems are officially supported and how active the community is. A board with excellent hardware but outdated software quickly becomes a paperweight. A good single-board computer case with proper ventilation is worth adding whichever board you choose.
Side-by-side comparison
| Board | Type | Processor | Wireless | Logic level | Best for |
|---|---|---|---|---|---|
| Arduino Uno R3 | Microcontroller | 8-bit, 16 MHz | None | 5 V | First steps in electronics |
| Arduino Uno R4 WiFi | Microcontroller | 32-bit Cortex-M4, 48 MHz | Wi-Fi, Bluetooth | 5 V | Classrooms, connected learning projects |
| ESP32 DevKit | Microcontroller | Dual-core, up to 240 MHz | Wi-Fi, Bluetooth | 3.3 V | Wi-Fi sensors, home automation |
| ESP32-C6 board | Microcontroller | RISC-V, 160 MHz | Wi-Fi 6, Bluetooth LE, Thread, Zigbee | 3.3 V | Matter and smart-home devices |
| Raspberry Pi Pico 2 W | Microcontroller | Dual-core, 150 MHz | Wi-Fi, Bluetooth | 3.3 V | Precise timing, LED and custom interfaces |
| Raspberry Pi 5 | Computer | Quad-core Cortex-A76, 2.4 GHz | Wi-Fi, Bluetooth, Ethernet | 3.3 V | Cameras, servers, dashboards, AI |
| Arduino UNO Q | Hybrid | Quad-core Linux processor plus STM32 | Wi-Fi, Bluetooth | Check datasheet | Robotics and vision with real-time control |
The board is only part of the cost
A common budgeting mistake is comparing board prices alone. A microcontroller project needs a USB cable, a breadboard, jumper wires and sensors. A Raspberry Pi 5 needs a proper power supply, storage, a cooler and a case before it does anything useful, which can double the price of the bare board. When you compare options, compare complete kits.
Community and documentation
For a first project, choose the board with the most tutorials for exactly what you want to build. An obscure board that is ten percent faster is useless if the one library you need was written for something else. This is why Arduino, ESP32 and Raspberry Pi continue to dominate classrooms and hobby workshops even when newer chips appear.
Buy the board that has already solved your problem on paper. Speed differences matter far less than a working example you can copy and adapt.
Which board for which project
Learning electronics at school or at home
Start with an Arduino Uno R4 or R3 and a starter kit that includes LEDs, resistors, buttons, a small motor and a few sensors. The 5 V logic and the enormous library of beginner lessons make it the least frustrating path. Teachers building a class set should prefer original boards with consistent drivers, so every computer in the lab behaves the same way.
Wi-Fi sensors and home automation
An ESP32 with ESPHome is the quickest route from idea to a working sensor on your phone. Combine it with temperature and humidity sensors to monitor a geyser cupboard, a server corner, a greenhouse or a baby room, and let Home Assistant handle the dashboards and notifications.
Battery-powered data loggers
Choose an ESP32-C3 or C6 board designed for low power, or a Pico 2 if you do not need wireless. Wake up, measure, send or store the reading and go straight back to deep sleep. With a sensible board and a quality protected lithium cell, months of runtime are realistic.
Robots and motor control
Motors need precise, uninterrupted timing, which is microcontroller territory. Many successful robots use two brains: a microcontroller that drives the wheels and reads the sensors, and a Raspberry Pi that handles vision and planning. Our robotics development kits are a structured way to learn this split without designing everything from scratch.
Cameras, AI vision and media
Anything involving video streams, image recognition or a graphical interface belongs on a Raspberry Pi 5. Its camera connectors, fast processor and optional AI accelerators handle object detection, number-plate experiments and wildlife cameras that would overwhelm any microcontroller.
Small home servers
A Raspberry Pi 5 with an SSD makes a capable, low-power host for Home Assistant, a network-wide ad blocker, a VPN endpoint or a small file server. If you expect to run many services at once, a compact mini PC may be the better long-term investment, but for a first home lab the Pi is hard to beat.
| Project | Recommended board | Key extras |
|---|---|---|
| First electronics lessons | Arduino Uno R4 or R3 | Starter kit, breadboard, jumper wires |
| Wi-Fi temperature sensor | ESP32 DevKit | Digital temperature and humidity sensor, 5 V USB supply |
| Battery weather logger | ESP32-C3 or C6 low-power board | Protected lithium cell, weatherproof box |
| Line-following robot | Arduino or Pico 2 | Motor driver, chassis kit, battery pack |
| Security or wildlife camera | Raspberry Pi 5 | Camera module, SSD, 27 W supply, cooler |
| Home Assistant host | Raspberry Pi 5 | NVMe SSD, case with fan, small UPS |
Accessories you will actually need
A board on its own does very little. These are the extras that turn it into a working project, most of which you will find among our development board accessories.
A proper power supply. Microcontroller boards are happy with a decent 5 V USB supply. A Raspberry Pi 5 needs its dedicated 5 V, 5 A USB-C supply.
A data-capable USB cable. Many cheap cables only charge. If your computer does not detect the board, try another cable before you blame the hardware.
Breadboard and jumper wires. Solderless prototyping lets you change a circuit in seconds.
Basic components. Resistors, LEDs, buttons, transistors and headers from our electronic components and connectors range cover most beginner circuits.
A multimeter. Measuring voltage and current is the fastest way to find a mistake and the only way to verify battery life claims.
A soldering station. Sooner or later you will want permanent connections. A temperature-controlled soldering station is far easier to use than a cheap fixed-power iron.
Level shifters. Essential whenever 5 V modules meet 3.3 V boards.
A word on mains voltage
Relay modules make it tempting to switch lights, pumps or geysers directly. Remember that mains electricity at 230 V can kill, and that installations must meet local wiring regulations. Use certified smart switches or have a qualified electrician install anything connected to mains, and keep your development board on the safe low-voltage side.
Low-voltage projects are forgiving. Mains projects are not. If a tutorial asks you to open a wall box, find a different tutorial or call an electrician.
Five mistakes that kill a first board
Feeding 5 V into a 3.3 V pin. The classic ESP32 and Raspberry Pi mistake. Check the logic level of every module before you connect it.
Shorting pins with a stray wire. Work on a clean, non-conductive surface and never rewire a circuit while it is powered.
Using the wrong power supply. Weak supplies cause random resets that look like software bugs, while unregulated supplies can destroy a board.
Pulling the plug on a Raspberry Pi. Shut it down properly or protect it with a UPS and an SSD.
Drawing too much current from a pin. Microcontroller pins can drive an LED, not a motor. Use a transistor or motor driver for anything heavier.
When something does not work
Start with the basics: is the board detected over USB, is the correct board and port selected in the software, and does a simple example sketch run? Nine times out of ten the fault is a cable, a missing driver or a wrong setting, not a dead board. PlatformIO and the Arduino IDE both show clear upload logs that point to the problem.
Verdict: which development board should you buy?
There is no single best board, but there is a best board for your first project. Match the family to the job, and the rest follows naturally.
Quick recommendations
- Complete beginner or classroom: Arduino Uno R4 with a starter kit.
- Wi-Fi sensor or smart-home gadget: ESP32 DevKit, or an ESP32-C6 board for Matter and Zigbee.
- Battery-powered logger: a low-power ESP32-C3 or C6 board, or a Pico 2 without wireless.
- Robotics: a microcontroller for the motors, plus a Raspberry Pi 5 when you add vision.
- Camera, dashboard or home server: Raspberry Pi 5 with an SSD, a 27 W supply and active cooling.
Budget tiers
- Entry level: a compatible ESP32 or Arduino-style board, a breadboard and a few sensors cost less than a restaurant meal for two.
- Mid-range: an original Arduino Uno R4 starter kit or a set of ESP32 boards with quality sensors is the sweet spot for most learners.
- Full computer kit: a Raspberry Pi 5 with power supply, cooler, case and SSD costs several times more, but replaces a small PC for many tasks.
Whatever you choose, buy one board more than you think you need. Every maker eventually destroys one, and having a spare turns a frustrating evening into a five-minute swap.
Frequently asked questions
Is Arduino or Raspberry Pi better for beginners?
For learning electronics, Arduino is easier: one program, instant feedback and very forgiving 5 V wiring. For learning programming, Linux and networking, a Raspberry Pi is the better teacher. Many schools start with Arduino and add Raspberry Pi in later years.
Can an ESP32 replace an Arduino?
In most projects, yes. An ESP32 is faster, has more memory and adds Wi-Fi and Bluetooth, and it can be programmed in the same Arduino IDE. The main difference is its 3.3 V logic, so older 5 V shields and modules may need level shifting.
Can a Raspberry Pi run Arduino code?
Not directly. Arduino sketches are compiled for microcontrollers. A Raspberry Pi can run the Arduino IDE and program a connected Arduino, or you can rewrite the logic in Python using the Pi’s own GPIO pins.
Do I need to solder?
Not at first. Many boards come with headers already soldered, and a breadboard lets you build circuits without heat. Learning to solder becomes useful once a project moves into a permanent enclosure.
Which programming language should I learn?
Arduino uses a simplified form of C++, which is the industry language for microcontrollers. MicroPython offers a friendlier start on ESP32 and Pico boards. On a Raspberry Pi, Python is the natural first choice.
How much power does a Raspberry Pi 5 use?
Typically a few watts at idle and noticeably more under full load with USB devices attached. That is why the dedicated 27 W supply is recommended. For comparison, an ESP32 sensor can spend most of its life drawing microamps.
Is the Raspberry Pi Pico the same as a Raspberry Pi?
No. The Pico and Pico 2 are microcontroller boards, closer to an Arduino than to a computer. They do not run Linux, but they are excellent for precise timing and low-cost control projects.
Ready to start building? Browse Arduino, ESP32 and Raspberry Pi boards, sensors, kits and accessories at DistriNode South Africa. If you are unsure which board suits your project, send us a short description and we will point you in the right direction.
Leave a comment